How to Send a WhatsApp Message
WhatsApp & Messaging
Use WhatsApp messaging in UpBlick to contact a customer from the correct business location with a prepared and approved message template. This is useful for review requests, reminders, feedback follow-ups, and other customer communication supported in your account.
Before you send a message
- Select the correct business location.
- Confirm that a WhatsApp channel is connected.
- Make sure the customer has consented to receive WhatsApp communication.
- Check that the customer record includes a valid mobile number or WhatsApp number.
- Confirm that the template you want to use is approved and active.
Step 1: Confirm the WhatsApp channel is ready
- Open Automation.
- Select Channels.
- Open the WhatsApp tab.
- Check that either UpBlick WhatsApp No or Your own WhatsApp No shows Connected.
If the channel is not connected, finish the setup first before trying to send any customer message.

Step 2: Choose the customer you want to contact
- Open Customers.
- Use search or the customer list to find the right person.
- Open the customer record or available customer action for messaging.
- Confirm the customer belongs to the location you selected.
If the customer is not listed yet, add the customer first and include the correct phone details before sending a message.

Step 3: Check the customer’s phone details
Before sending, make sure the customer profile has:
- A valid WhatsApp No or mobile number.
- The correct international phone code.
- Permission to receive business communication through WhatsApp.
If the number is outdated, incomplete, or saved under the wrong code, the message can fail even when your WhatsApp channel is connected.
Step 4: Select the approved template
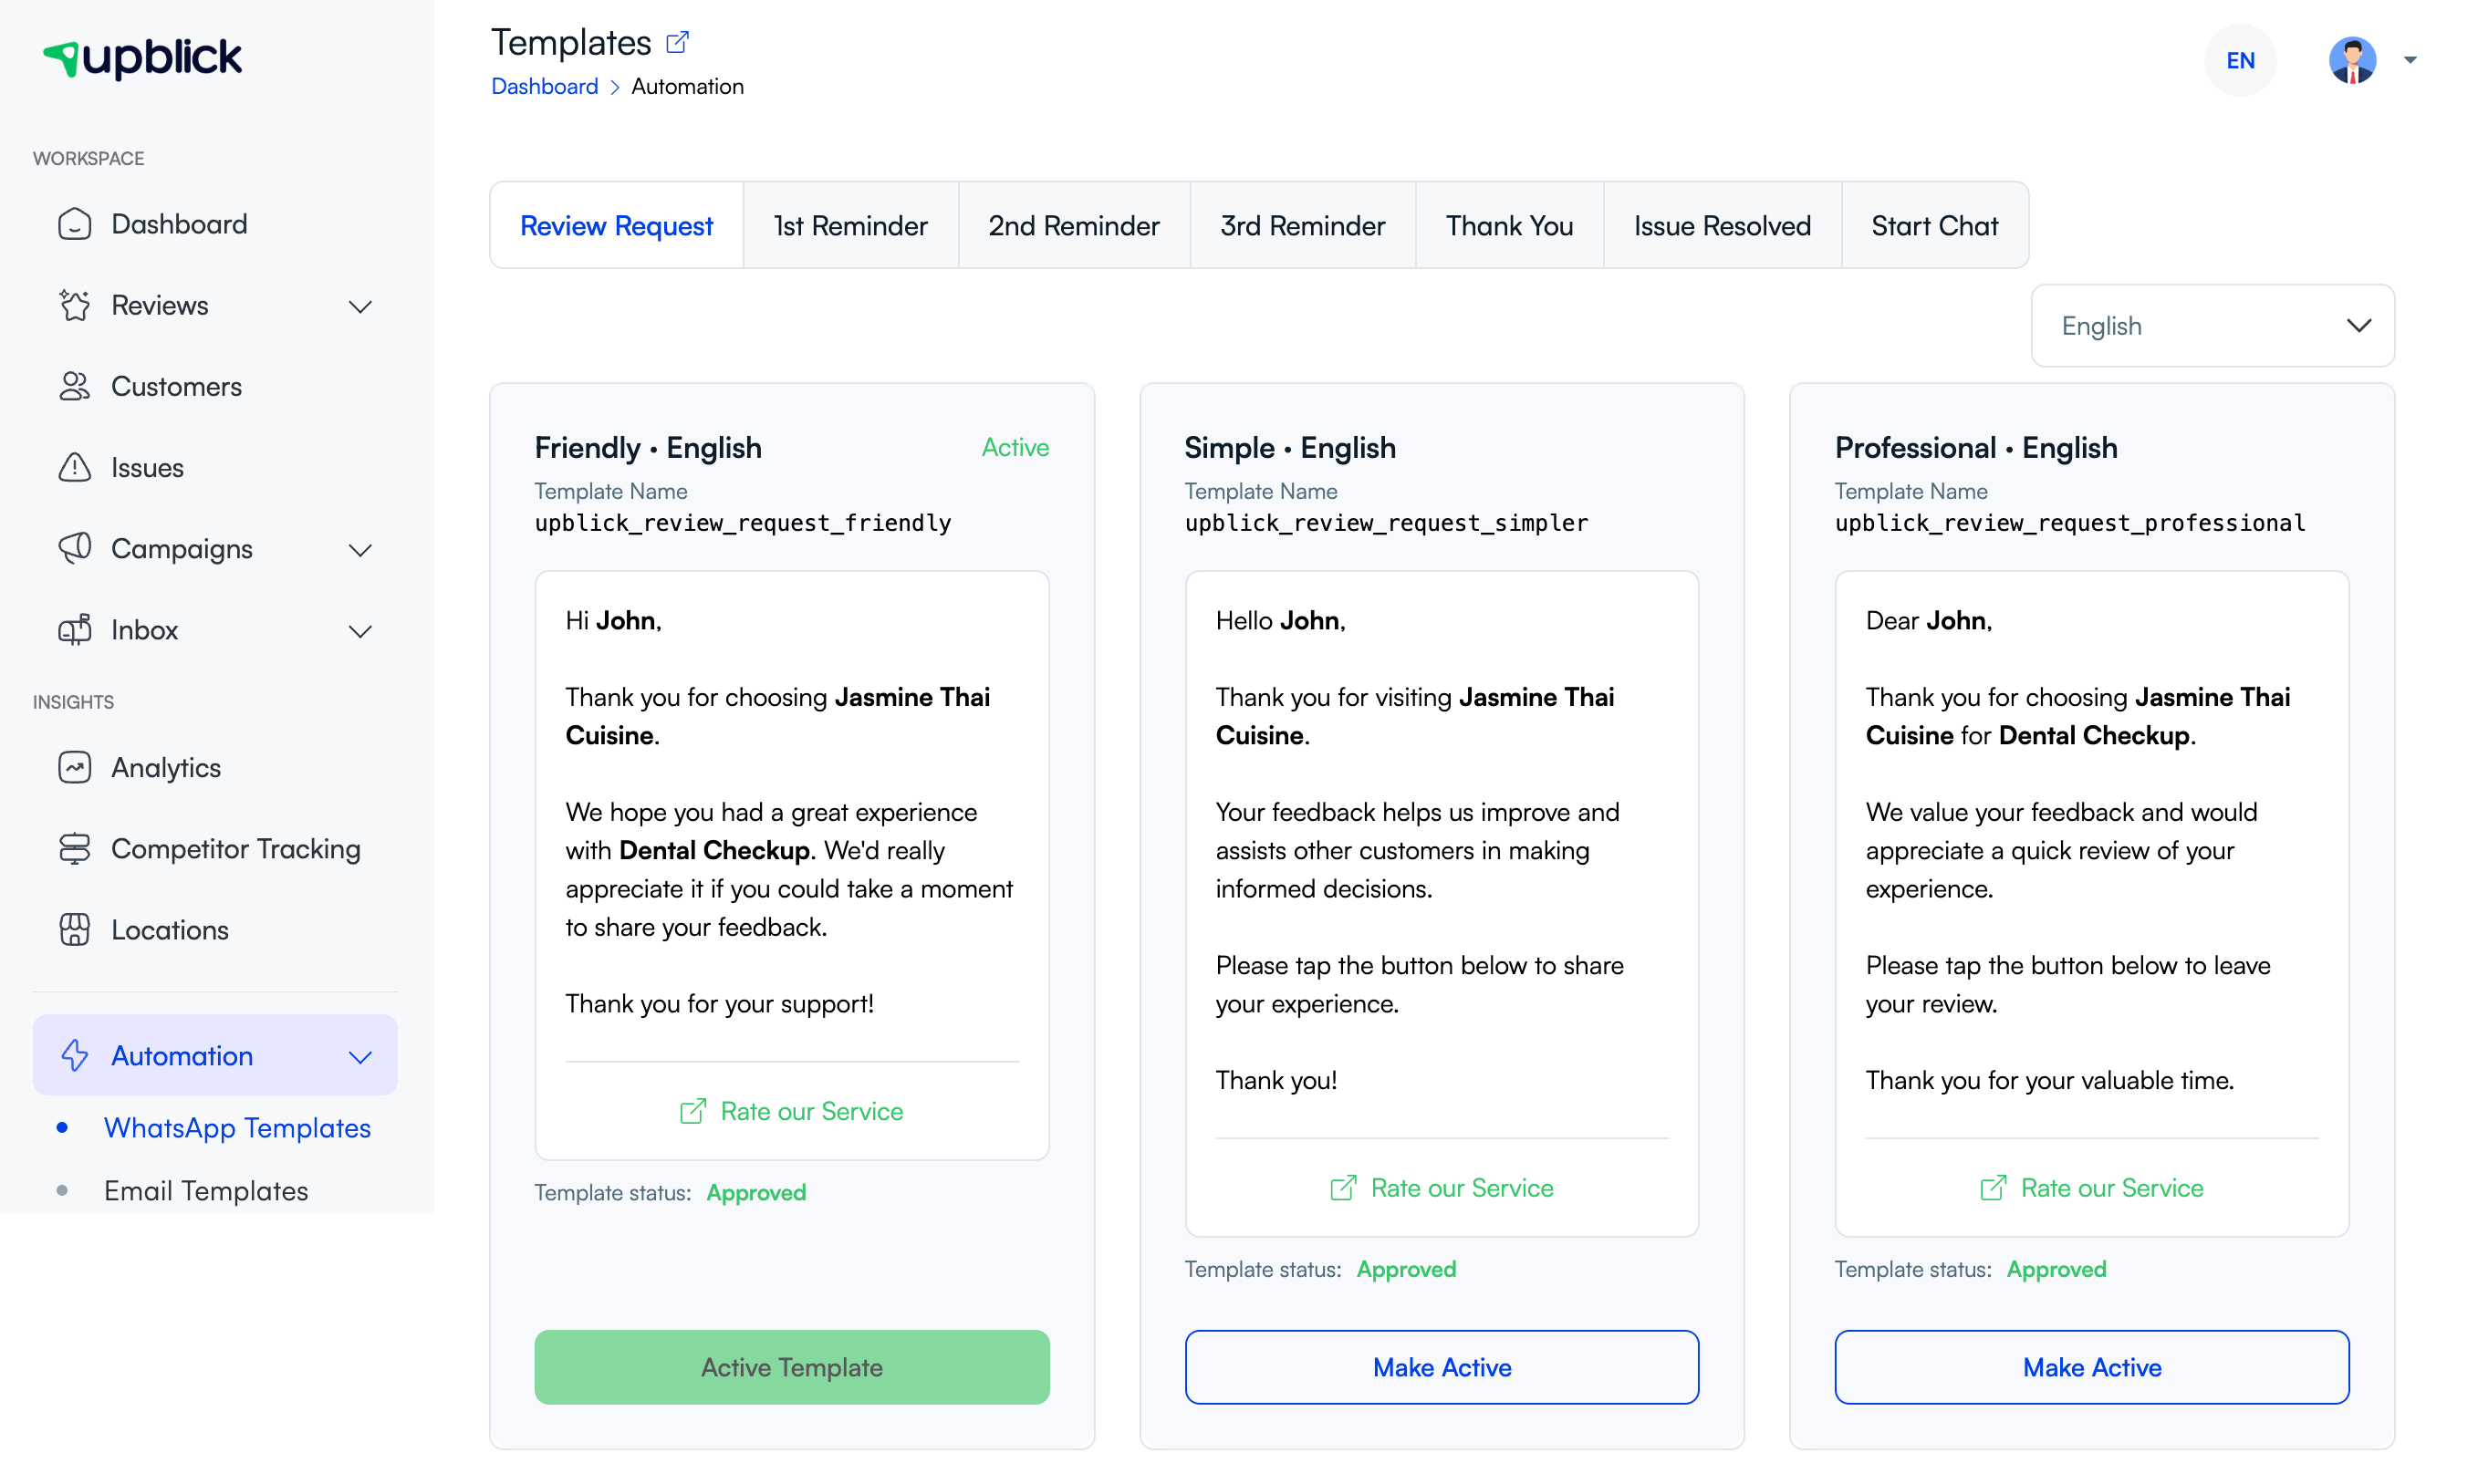
- Open Automation > WhatsApp Templates.
- Select the message type that matches your goal.
- Choose the correct language.
- Review the template content and status.
- Make the approved template active, or select it during the send flow if your workflow allows that.
Using the right template helps keep the message consistent, compliant, and ready for delivery.
Step 5: Send the WhatsApp message
From the customer’s available action or message flow in UpBlick, choose the WhatsApp message option for the communication you want to send. Then:
- Confirm the selected template.
- Check that the right customer and location are shown.
- Send the message.
UpBlick then queues the message through the connected WhatsApp setup for that location.
Step 6: Check the message activity
After sending, review the available status information in the relevant reporting or customer activity view in UpBlick. Depending on the workflow and provider response, you may see progress such as queued, sent, opened, or completed.
Best practices
- Send WhatsApp messages only when the customer has agreed to receive them.
- Use the customer’s preferred language when a matching template is available.
- Keep templates aligned to the purpose of the message.
- Double-check the active location before sending.
- Test important workflows on an internal test contact before broad use.
Troubleshooting
Frequently asked questions
Do I need my own WhatsApp Business number to send messages?
No. UpBlick can support either the shared UpBlick WhatsApp option or your own connected WhatsApp Business number, depending on your setup.
Can I send a WhatsApp message without a template?
For repeatable business communication in UpBlick, you should expect to use an approved template. The exact template depends on the workflow and message type.
Why should I check the active location first?
Because the connected WhatsApp channel, template setup, and customer context can all vary by location.
Related Articles
Turn every customer touchpoint into review growth
Use UpBlick to collect feedback, request Google reviews, recover bad experiences, and understand customer sentiment.
Need help with UpBlick?
Use these guides to set up review collection, customers, WhatsApp automation, issue recovery, and reporting.
Start growing reviews with UpBlick