How to Set Up Your Business Profile?
Getting Started
Set up your UpBlick business profile so customers see useful and accurate information for the location they interact with.
This guide explains how to manage a location’s settings, contact details, images, services, and social media links.
What is a business profile in UpBlick?
A business profile contains the information used for one UpBlick location. This includes its business summary, review links, contact details, images, services, and public social links.
If your business has multiple locations, set up each location separately so its information stays accurate.
Why complete your business profile?
- Help customers recognize the correct business and location.
- Keep your review and Google Maps links accurate.
- Show useful contact details, services, images, and social profiles.
- Keep location-specific information organized in one place.
Before you start
Make sure you:
- Have already added the business location to UpBlick.
- Are logged in to an account that can manage the location.
- Have the correct Google Review Link and Google Map URL.
- Have your contact details, business description, services, and public social links ready.
- Use JPG, JPEG, PNG, or WebP images no larger than 5 MB each.
How to set up your UpBlick business profile
Step 1: Open Locations
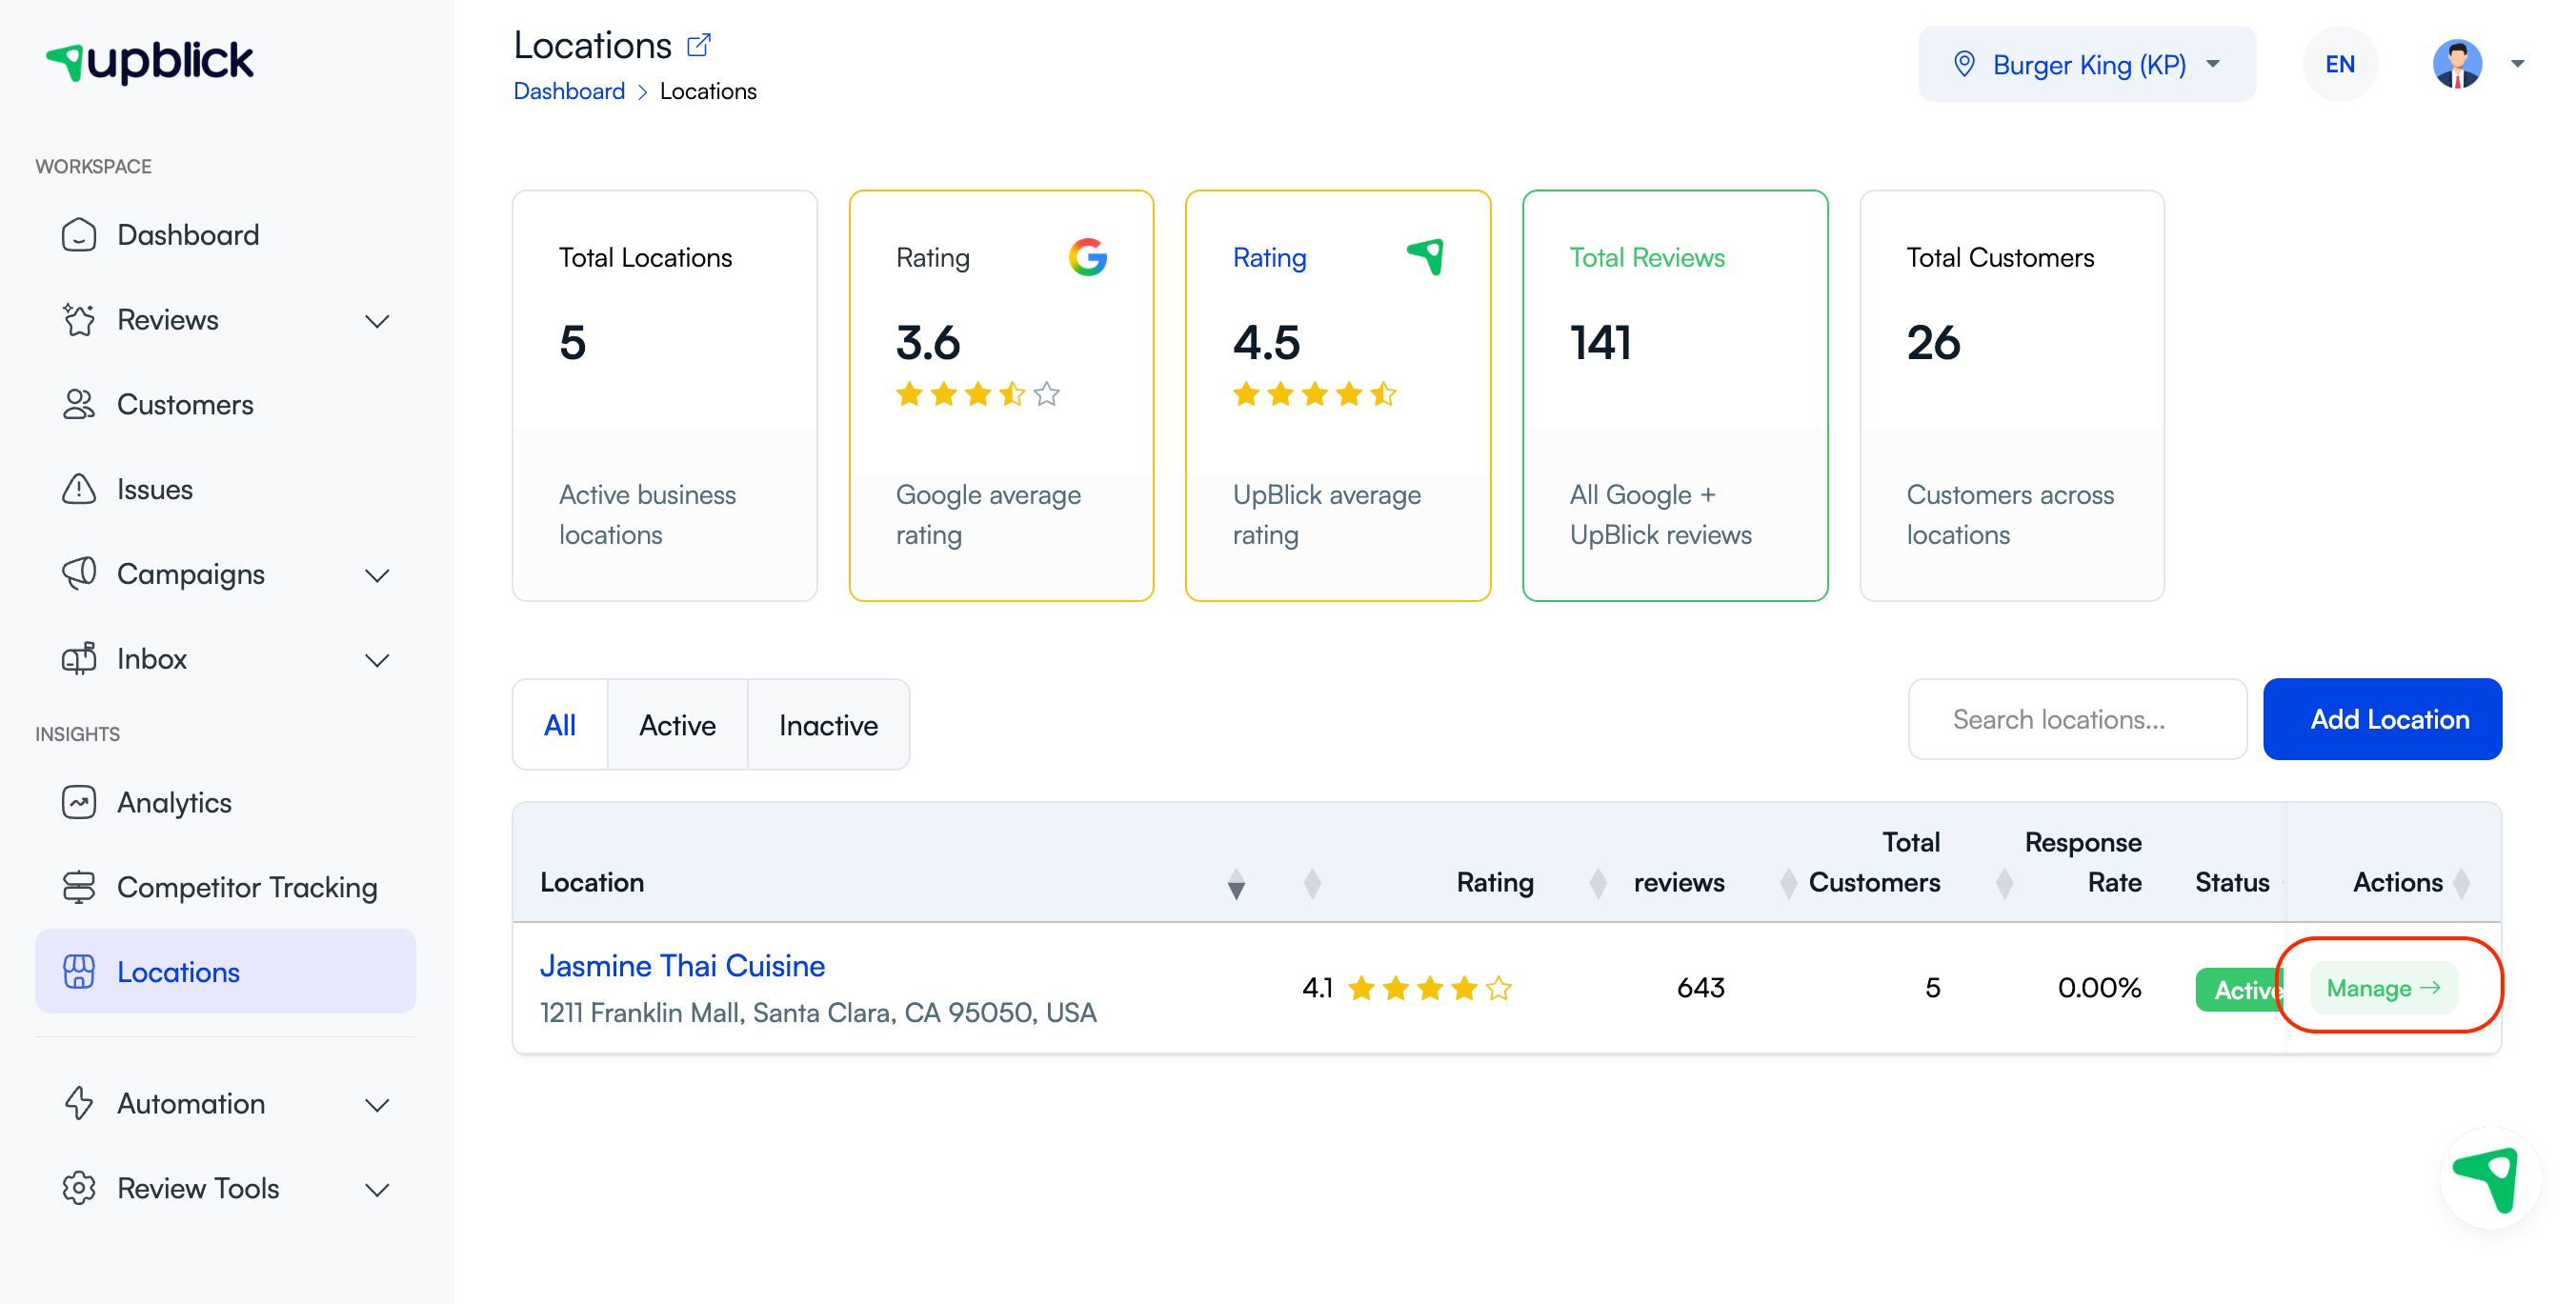
From your UpBlick dashboard, select Locations in the sidebar.
Step 2: Open the location you want to manage
Find the correct business location in the list, then select Manage in the Actions column.
If you have several locations, check the business name and address before continuing.
Step 3: Complete the Settings tab
On the Manage Location page, use the Settings tab to update:
- Preferred Language
- Preferred Currency
- About Business
- Review Link
- Google Map URL
Review the location summary shown on the right, then select Save Changes.

Step 4: Add contact details
Select Contact Details. Add or update the contact person, email address, phone numbers, and WhatsApp numbers for this location.
Select Save Changes before moving to another tab.
Step 5: Add location images and a banner
Use the Images tab to upload multiple location images. Use the Banner Image tab to upload one banner image.
You can also remove an existing image when it is no longer current. Save each tab after making changes.
Step 6: Add services and features
Select Services, then add the services and useful features available at this location. Select Save Changes.
Step 7: Add social media links
Select Social Media Links. Add the public profile URLs that apply to the business, such as Google, Facebook, Instagram, X, LinkedIn, YouTube, or WhatsApp.
Use complete, valid URLs, then select Save Changes.
What happens next?
UpBlick saves each section to the selected location. The information becomes available to the location’s UpBlick profile and related customer-facing experiences.
Review the location summary and test the Review Link and Google Map URL before you begin sharing review requests with customers.
Tips
- Write a short About Business description that clearly explains what the location offers.
- Use current images that accurately represent the location.
- Test every URL after saving it.
- Save one tab before opening another tab.
- For multiple locations, confirm the selected location in the location switcher before editing.
Troubleshooting
Frequently asked questions
Does updating this profile change my Google Business Profile?
No. These changes update the selected location in UpBlick. They do not edit your business information on Google.
Does one business profile apply to every location?
No. Each UpBlick location has its own profile. Select and update each location separately.
Can I upload more than one location image?
Yes. The Images tab accepts multiple images. The Banner Image tab stores one banner for the location.
Should I test my Review Link after saving it?
Yes. Open the link and confirm that it leads to the correct Google review page before sending it to customers.
Related Articles
Turn every customer touchpoint into review growth
Use UpBlick to collect feedback, request Google reviews, recover bad experiences, and understand customer sentiment.
Need help with UpBlick?
Use these guides to set up review collection, customers, WhatsApp automation, issue recovery, and reporting.
Start growing reviews with UpBlick