How to Add a Customer?
Customers
Add a customer in UpBlick when you want to save their details, organize them under the correct business location, and optionally send a review request after an interaction.
Before you start
- Select the correct business location.
- Confirm the customer has agreed to share their contact details.
- Keep at least one contact method ready: WhatsApp number, mobile number, or email address.
- If you want to send a review request immediately, make sure a review request template is available.
Step 1: Open Customers
From the UpBlick sidebar, select Customers. The Customers page shows totals, review status, search, filters, and the customer list for the selected location.

Step 2: Select Add Customer
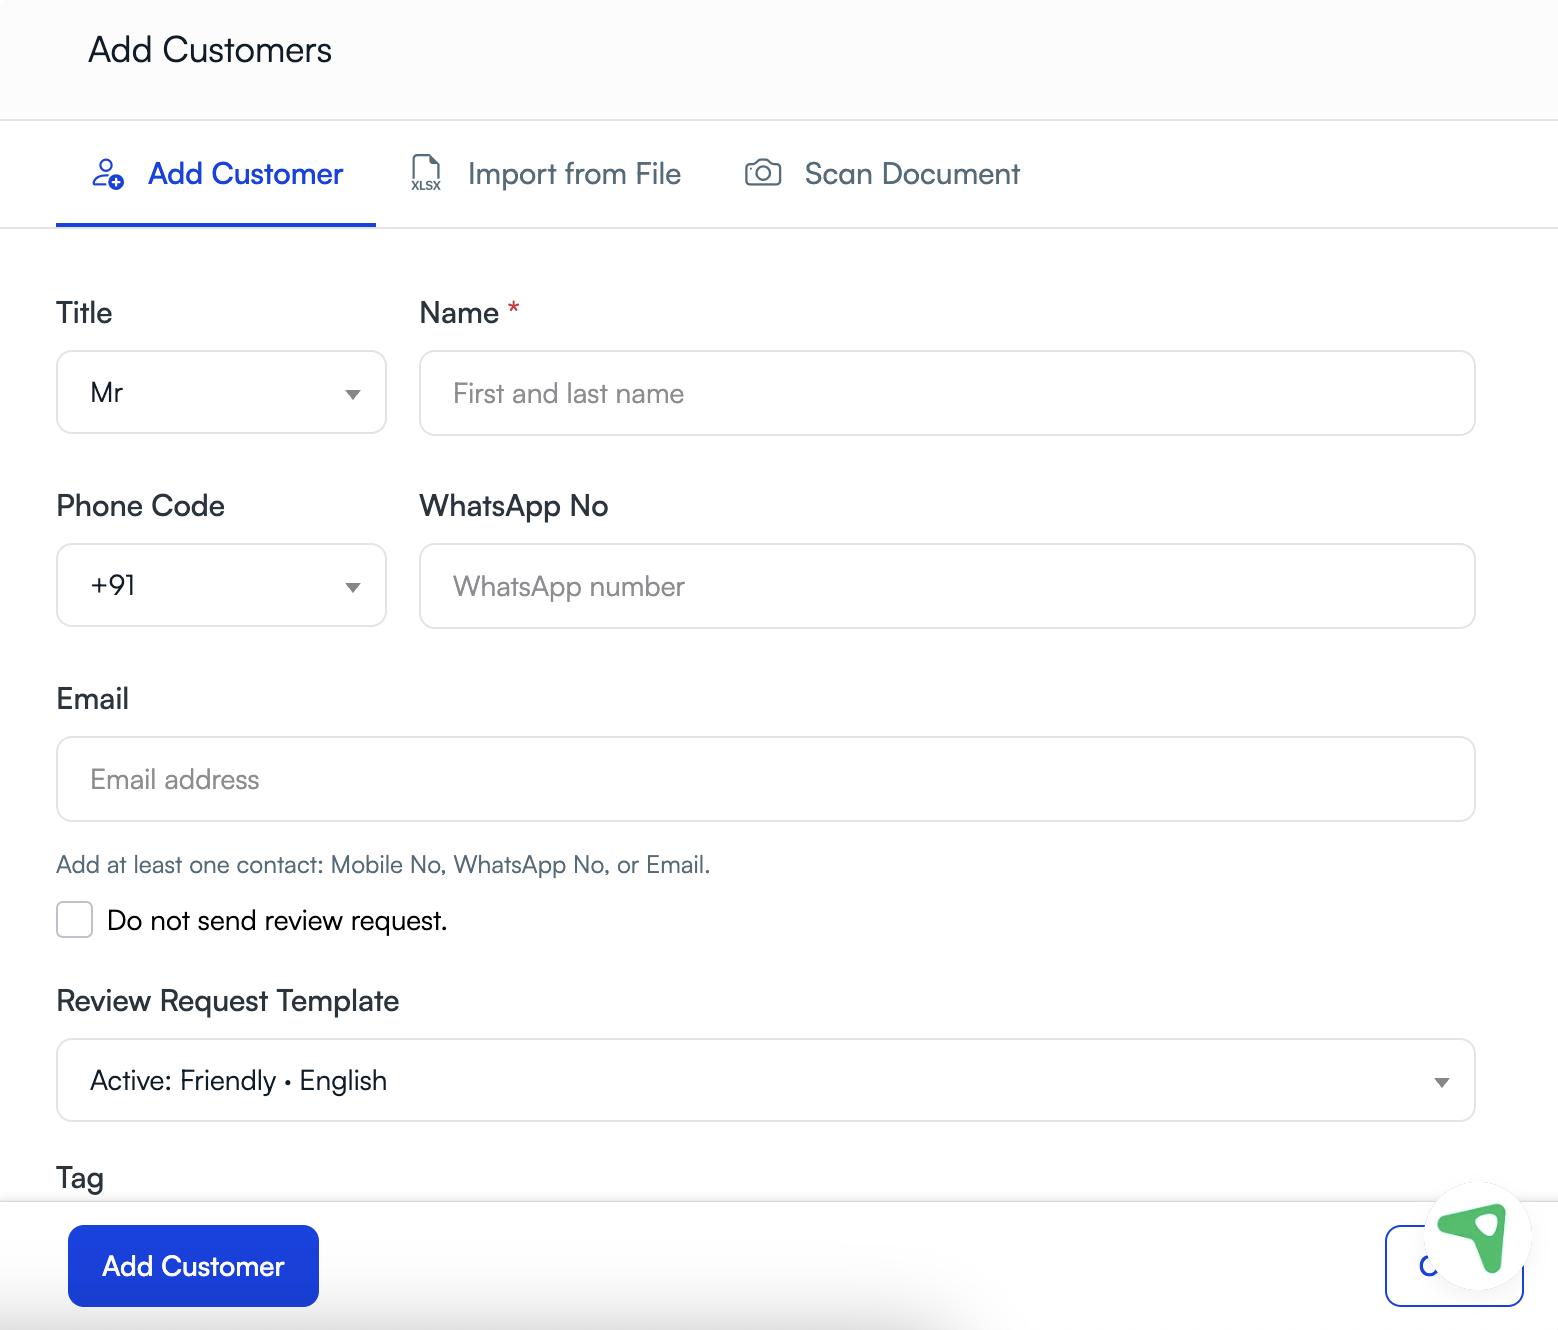
Select Add Customer. The Add Customers panel opens with the Add Customer tab selected.
Step 3: Enter customer details
- Select the customer’s Title, if required.
- Enter the customer’s Name.
- Select the correct Phone Code.
- Enter the customer’s WhatsApp number when you plan to send WhatsApp communication.
- Enter the customer’s email address when you plan to send email communication.
- Add tags when you want to organize customers by visit type, campaign, service, or segment.
UpBlick requires at least one usable contact method: mobile number, WhatsApp number, or email address.
Step 4: Choose whether to send a review request
If you want to save the customer without sending a request, select Do not send review request.
If you want UpBlick to send a review request after the customer is added, leave that option unchecked and select the review request template.
Step 5: Save the customer
Select Add Customer. UpBlick saves the customer under the selected location and, when enabled, queues the review request for delivery.
Tips
- Search before adding a customer to avoid duplicates.
- Use the correct phone code for international numbers.
- Keep names clean and readable because templates may use the customer name.
- Use tags consistently so customers are easier to segment later.
- Respect customer consent and communication preferences.
Troubleshooting
Frequently asked questions
Can I add a customer without sending a review request?
Yes. Select Do not send review request. before saving the customer.
Do I need both phone and email?
No. Add at least one usable contact method. The available communication channel depends on the details you save.
Can I import customers instead of adding them one by one?
Yes. Use Import from File when you want to add customers in bulk from a CSV, XLS, or XLSX file.
Related Articles
Turn every customer touchpoint into review growth
Use UpBlick to collect feedback, request Google reviews, recover bad experiences, and understand customer sentiment.
Need help with UpBlick?
Use these guides to set up review collection, customers, WhatsApp automation, issue recovery, and reporting.
Start growing reviews with UpBlick