How to Verify Your WhatsApp Number
WhatsApp & Messaging
Verify your WhatsApp number in UpBlick when you want to use your own WhatsApp Business number for customer messaging. The verification flow connects your business setup through Meta and confirms the number setup needed for future WhatsApp communication.
Before you start
- Select the correct business location in UpBlick.
- Decide that you want to send messages from your own WhatsApp Business number.
- Keep your business details ready for the setup flow.
- Make sure your team knows which number should be verified for customer communication.
Step 1: Open the WhatsApp channel
- Open Automation in the sidebar.
- Select Channels.
- Open the WhatsApp tab.
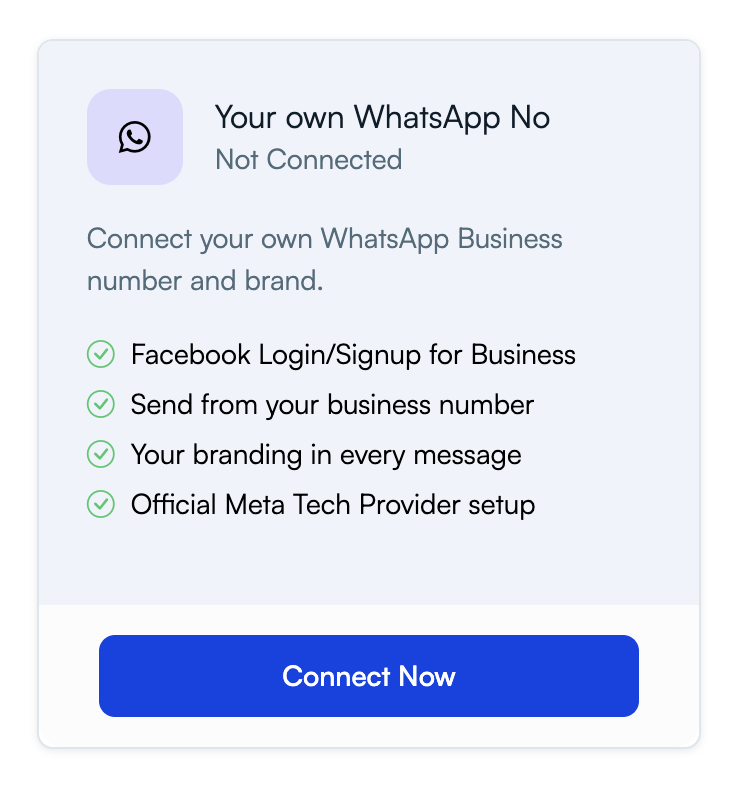
- Find the Your own WhatsApp No card.
- Select Connect Now.
Step 2: Start the Meta onboarding flow
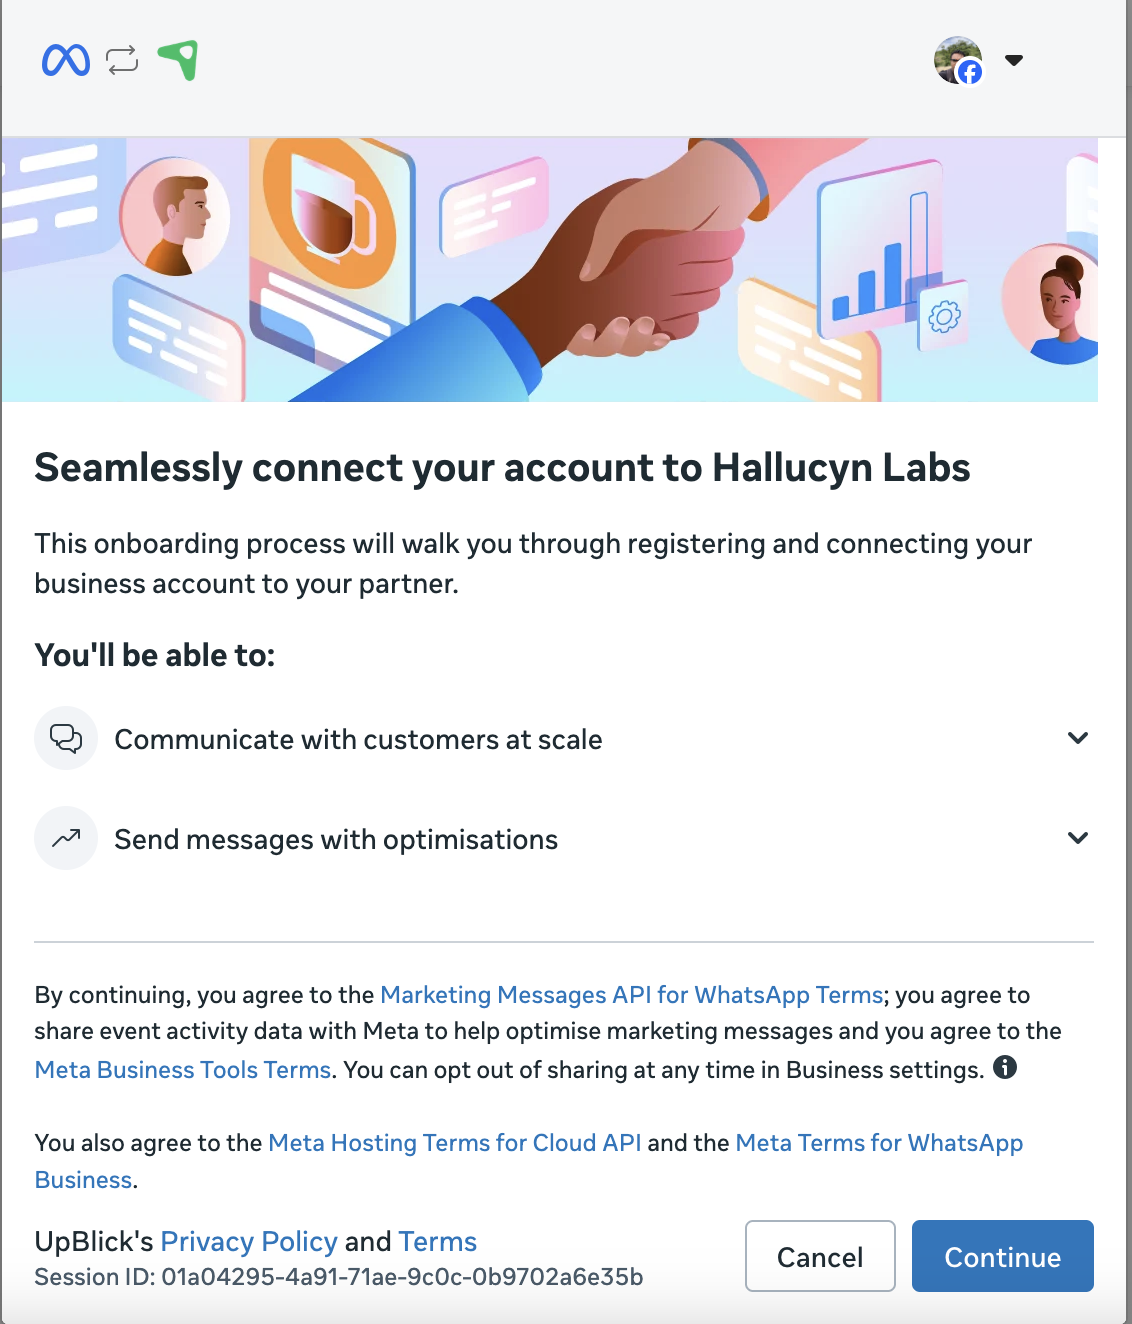
After selecting Connect Now, UpBlick opens the Meta connection flow. Review the onboarding screen and continue when you are ready to connect your business account.
Step 3: Select the business assets to share
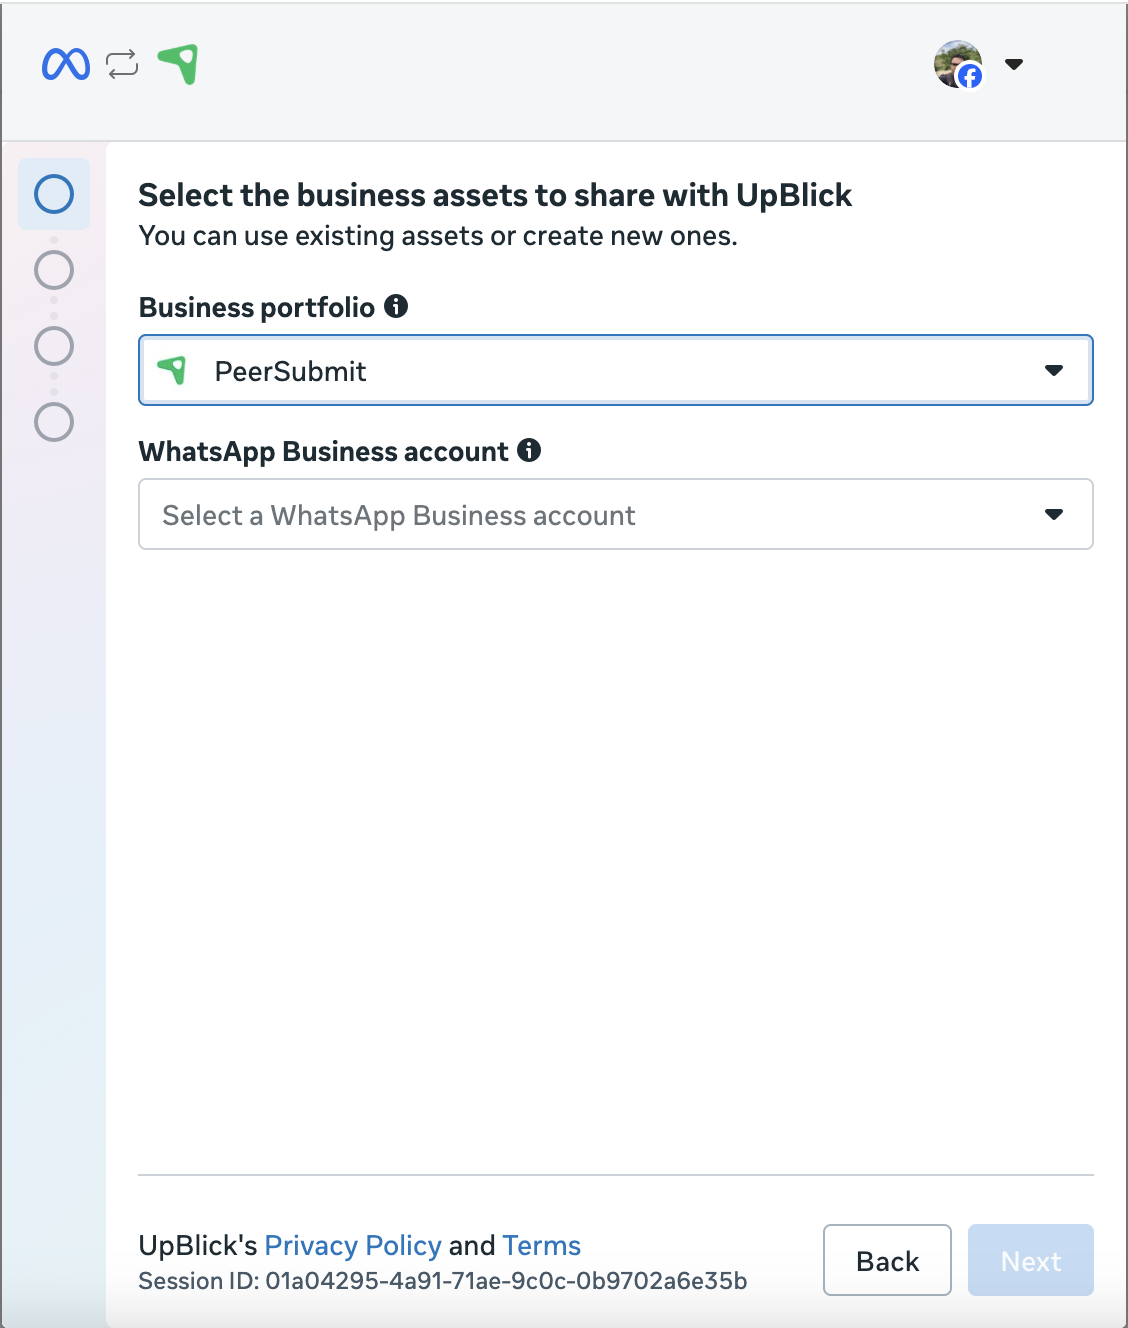
Choose the business portfolio and the WhatsApp Business account you want to connect with UpBlick. This step determines which business assets the WhatsApp setup uses.
Step 4: Enter business information for the setup
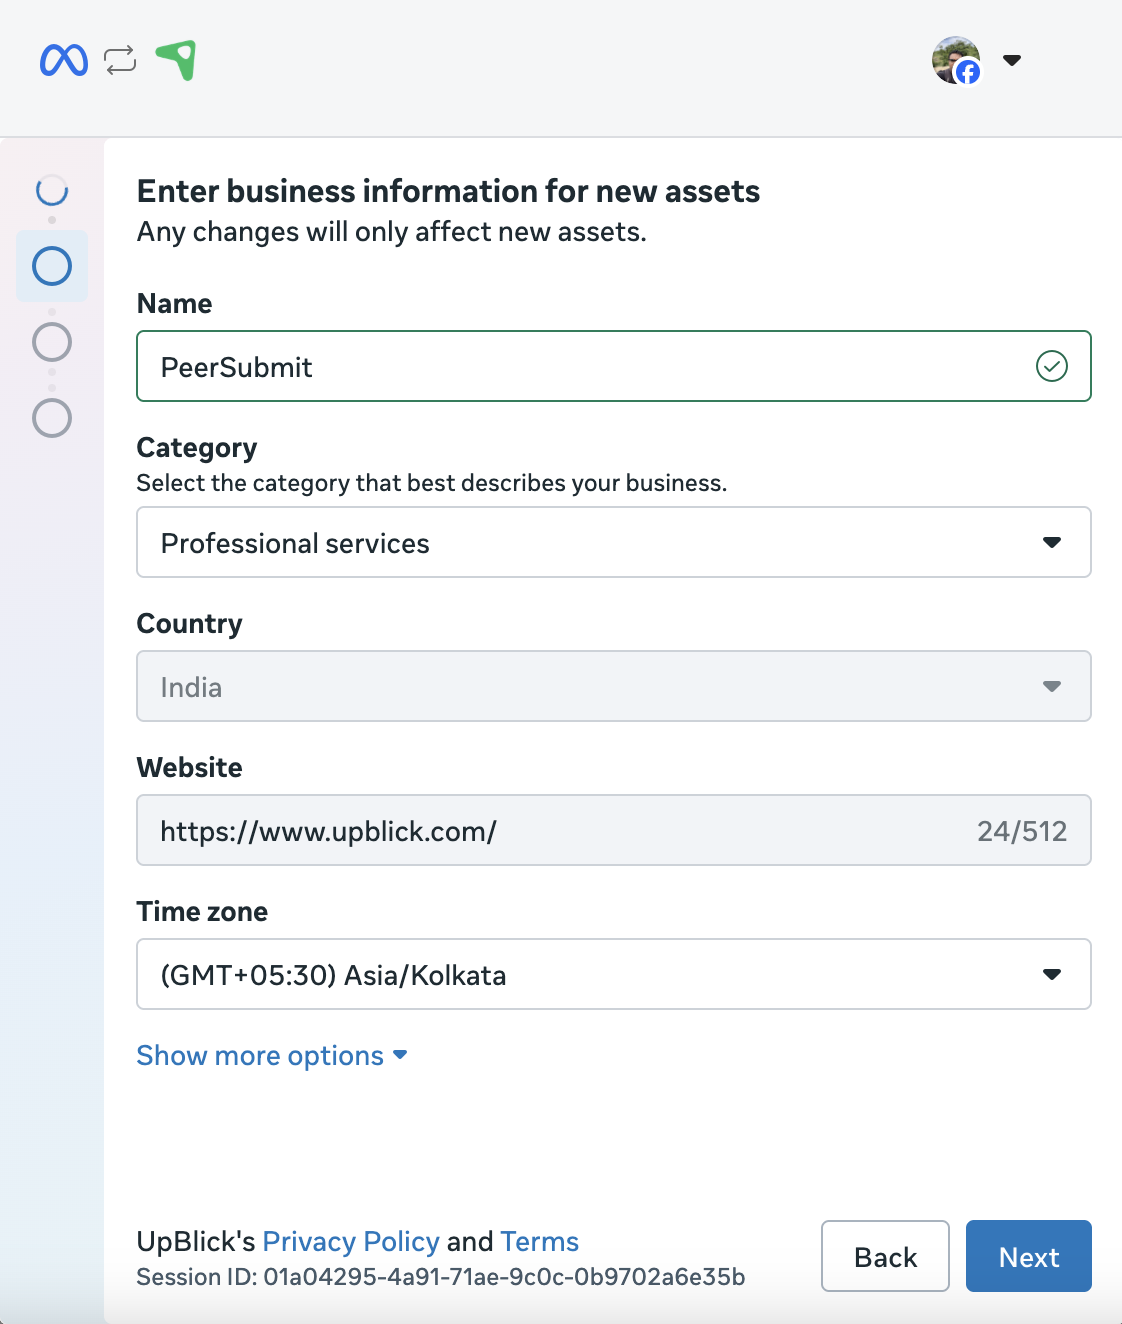
Complete the business information used during setup, such as the business name, category, country, website, and time zone. This step helps Meta and UpBlick associate the new or selected assets with the correct business identity.
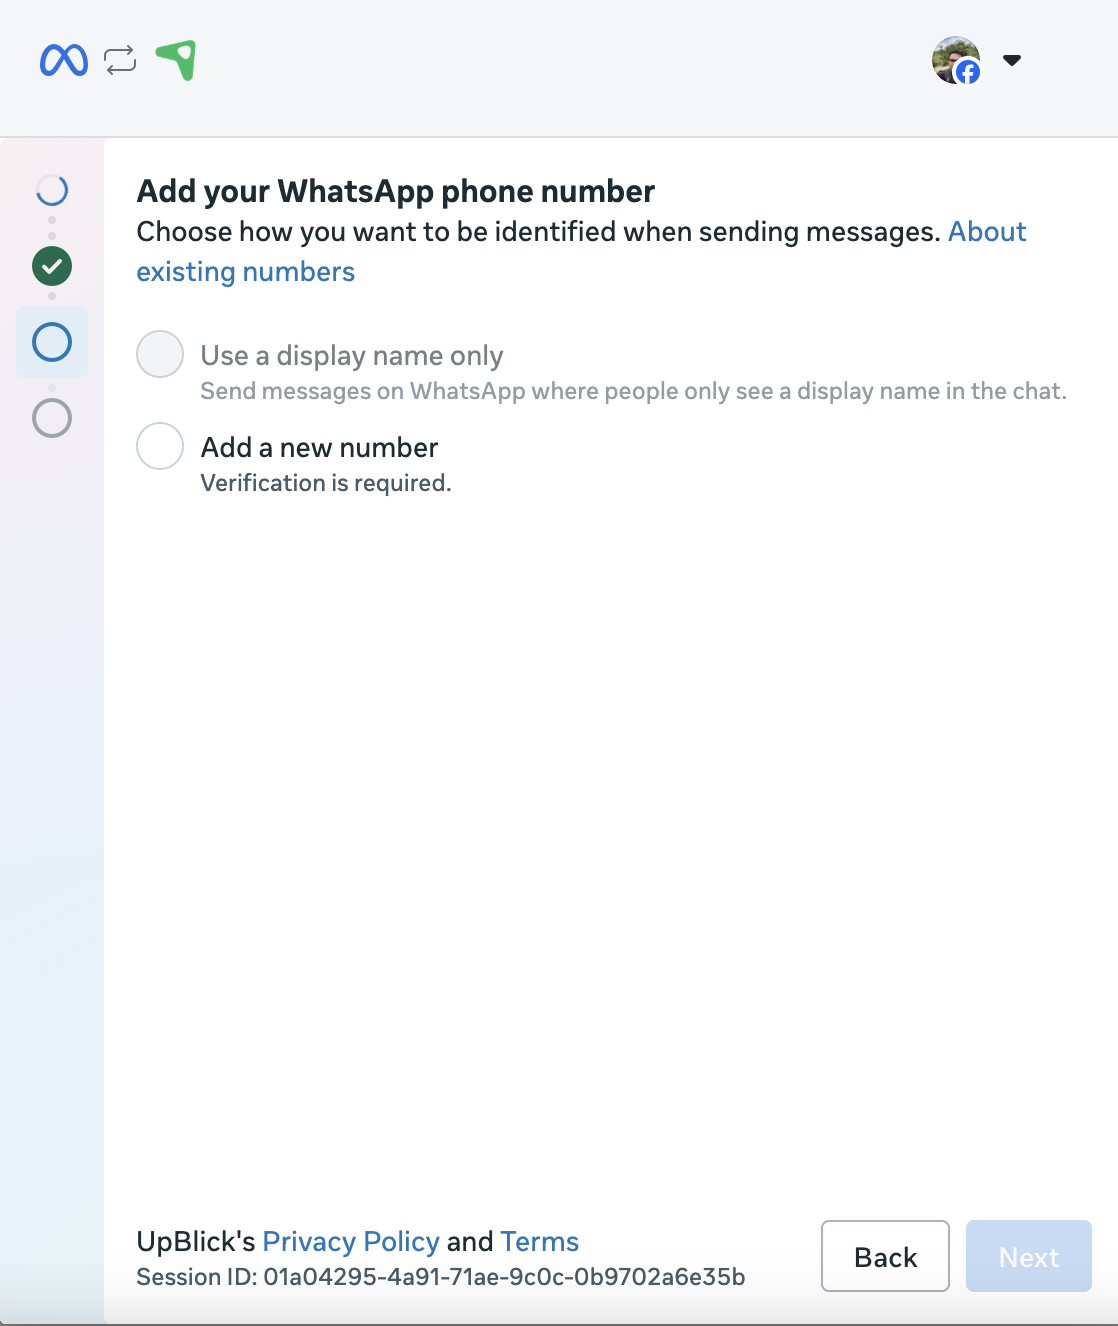
Step 5: Choose how the WhatsApp number should be identified
In the phone-number step, choose whether to use only a display name or add a new number. The screen notes that verification is required when you add a new number.
Step 6: Finish verification and return to UpBlick
Complete the remaining Meta steps shown in the flow. After the setup finishes, return to Automation > Channels > WhatsApp and confirm that Your own WhatsApp No shows as connected.

Step 7: Prepare templates before sending messages
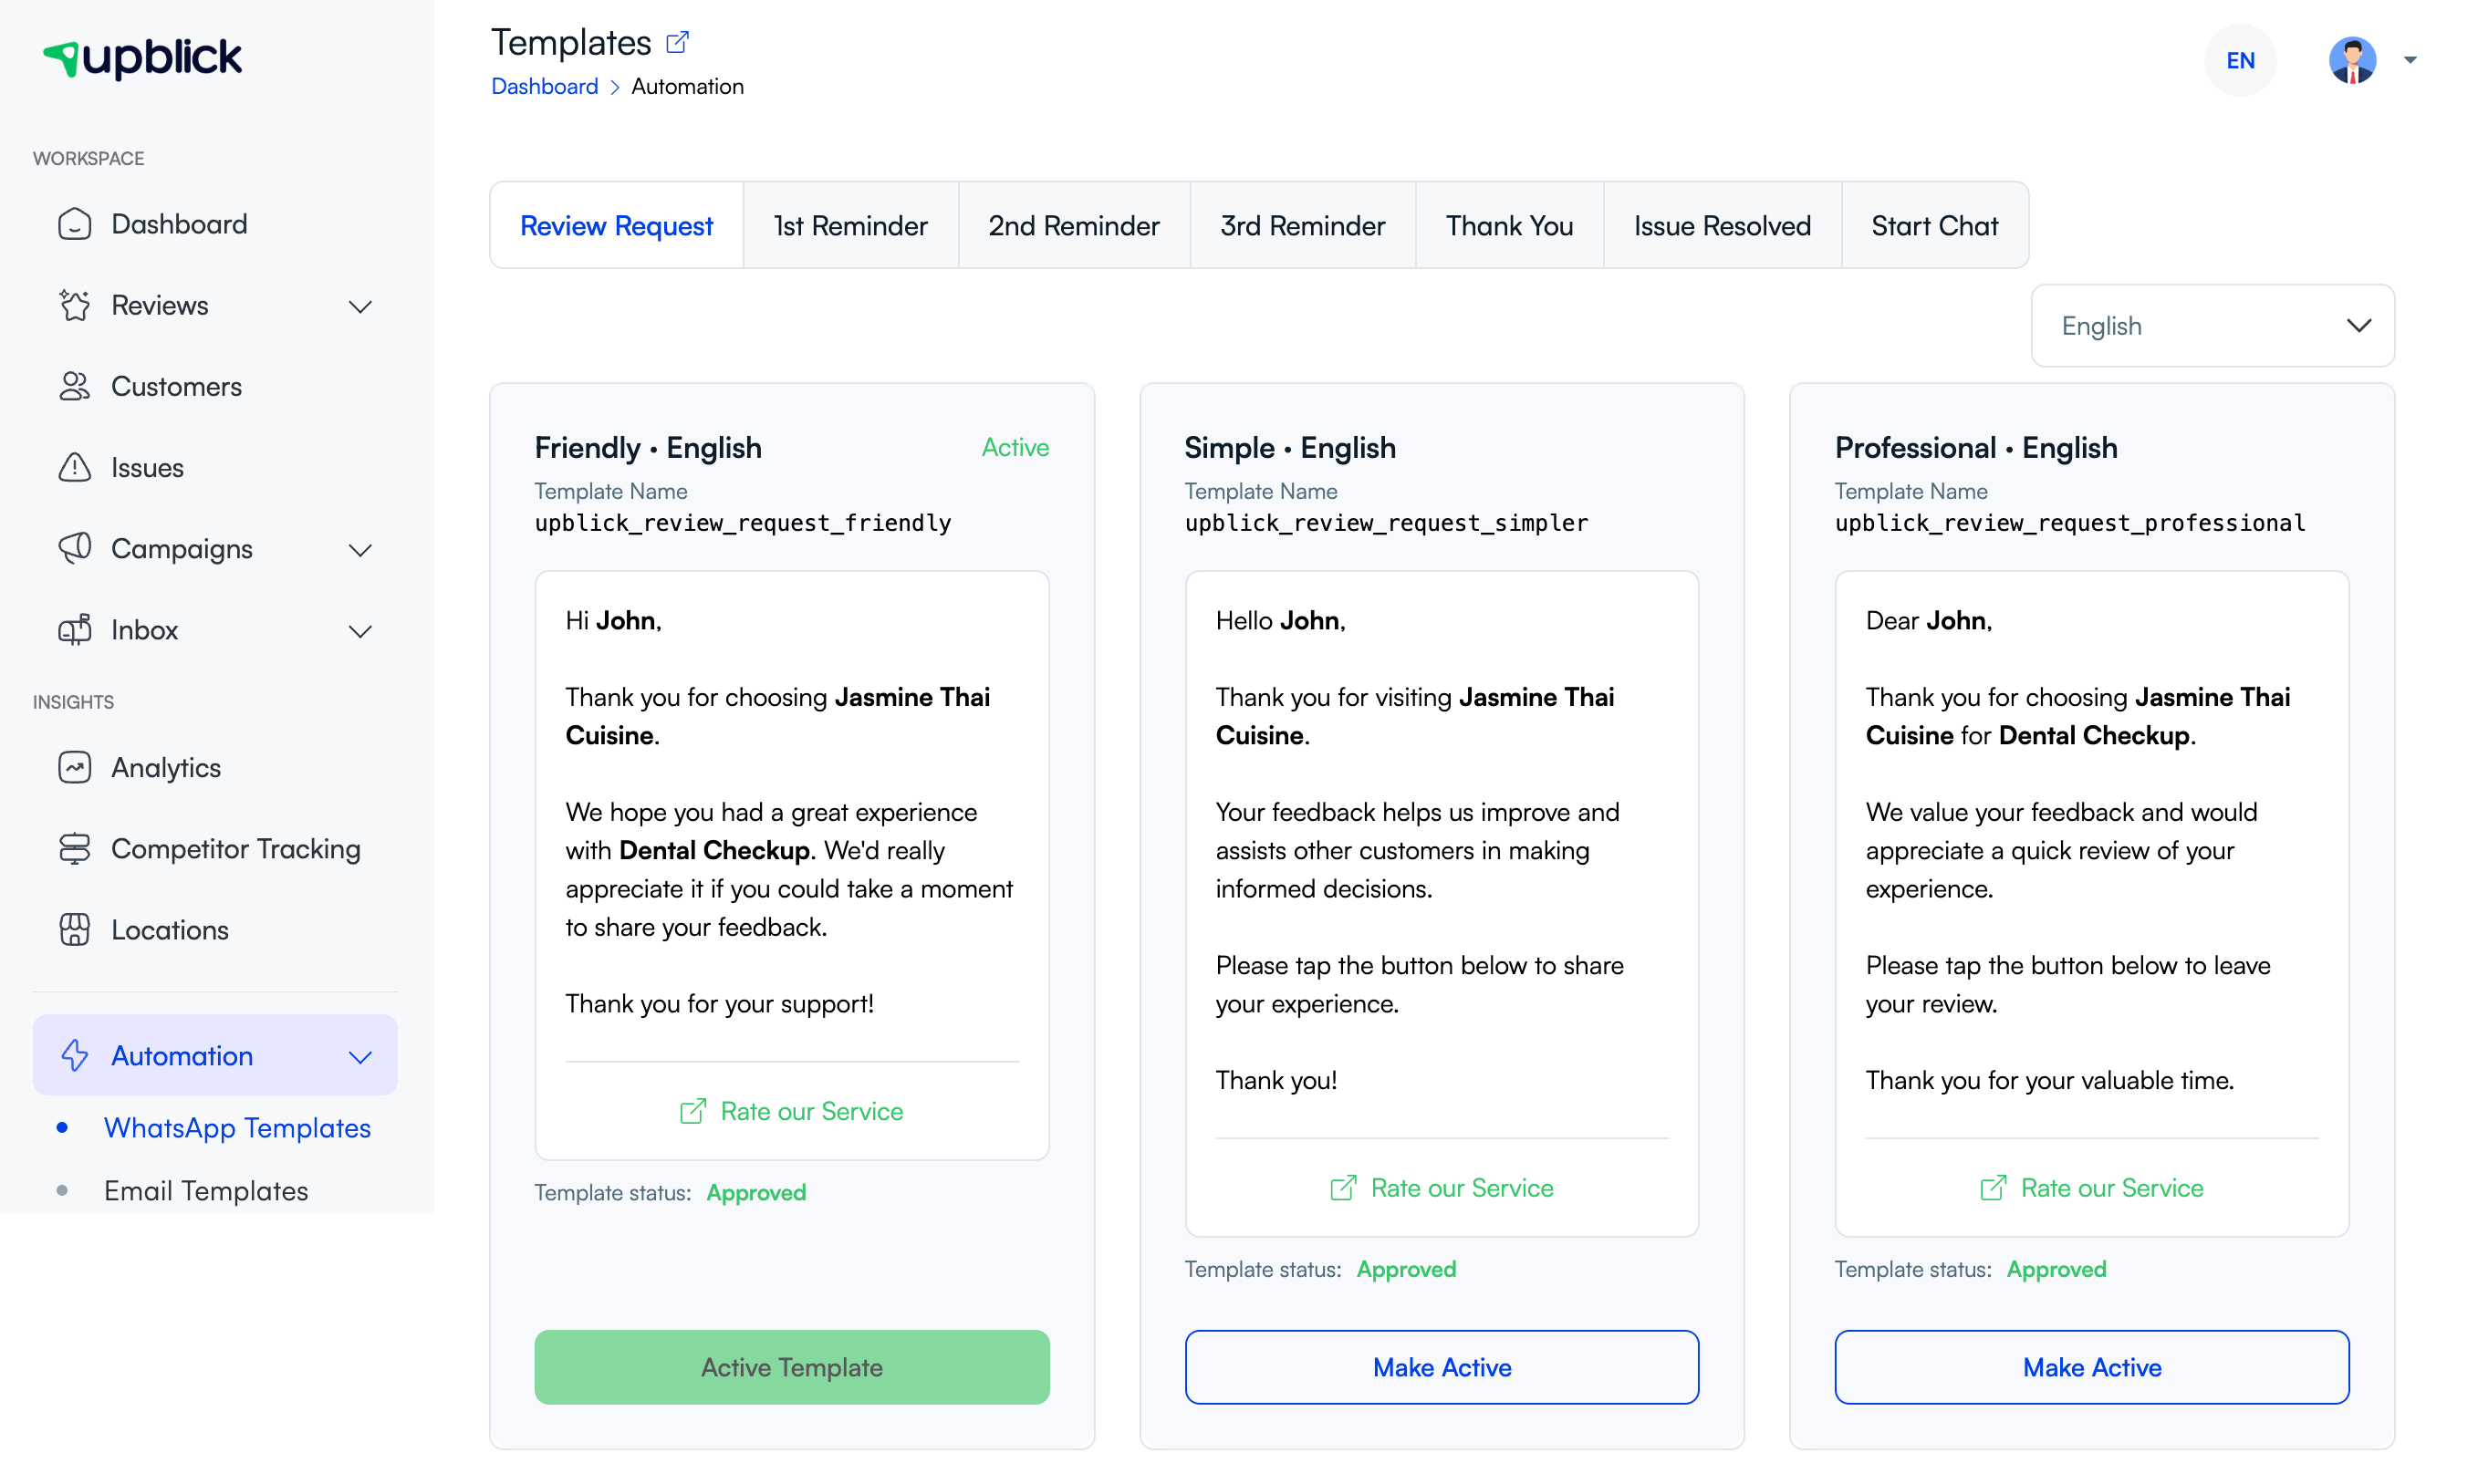
Once the number is verified and connected, activate the templates your team needs for review requests, reminders, or other WhatsApp communication.
- Open Automation > WhatsApp Templates.
- Select the relevant template type.
- Check the language and approval status.
- Make the approved template active.
What to check after verification
- The business WhatsApp option shows as connected.
- The correct business location is selected.
- The correct templates are available and active.
- Your team is ready to send messages from the verified business number.
- Customers have given permission for WhatsApp communication.
Best practices
- Verify the number for one location first and test the full flow before wider rollout.
- Use accurate business information during setup.
- Make sure the team knows which verified number is live.
- Activate only the templates your team is actually ready to use.
- Check consent before sending any customer message.
Troubleshooting
Frequently asked questions
Why do I need to verify my WhatsApp number?
Verification helps connect your own business number to the UpBlick WhatsApp workflow so customer messages can use your business messaging identity.
Is verification the same as enabling templates?
No. Verification connects the number. Templates prepare the actual messages your team will send through that number.
Can I send customer messages immediately after verification?
Only after the channel is connected, the correct templates are approved and active, the location is correct, and your team has permission to contact the customer through WhatsApp.
Related Articles
Turn every customer touchpoint into review growth
Use UpBlick to collect feedback, request Google reviews, recover bad experiences, and understand customer sentiment.
Need help with UpBlick?
Use these guides to set up review collection, customers, WhatsApp automation, issue recovery, and reporting.
Start growing reviews with UpBlick